崩溃的边缘
前天晚上,我使用我的电脑准备更新一下博客内容,结果发现报错:Ignoring local @import of "font-embedded.css,网上查了下,说是要更新Next版本到最新即可。

因此,痛定思痛,决定先整我的博客。
准备阶段
本文将省略xxx.github.io等Github Pages的配置,并且默认你已经安装完Hexo和Node,因此我们的关注点就是Next的配置和美化工作。
初始化
1 | # hexo 初始化 |
创建完成后,目录结构应该为
1 | . |
以前用Next主题写博客文章的时候,总会有一个疑惑,就是我直接在themes/next文件夹下修改了源码来适配,那Next更新了版本之后,我岂不是又要删了重新配置?
因此这一疑惑在7.8.0版本解决。
源码与配置文件分离
首先,在source文件夹下创建一个名为_data/的文件夹,在_data/文件夹下新建next.yml文件,将themes/next/_config.yml文件里的内容全部复制到source/_data/next.yml里,原因在Next源码里有说明:
1 | # If false, merge configs from `_data/next.yml` into default configuration (rewrite). |
哦~~~我懂了,意思就是_data/next.yml和themes/next/_config.yml文件中,只要谁的override为true,就用哪一个当做配置文件,那我们当然是选择_data/next.yml。
同时,在站点配置文件里设置next为博客的主题
1 | theme: next |
主题配置文件
1 | # Schemes |
至此,准备工作已经完成,运行
1 | $ hexo clean && hexo g && hexo s |
访问localhost:4000,就可以看到初始效果了。
Next美化
设置博主文字描述和中文语言
站点配置文件修改site
1 | # Site |
配置 hexo 中的 about、tag、categories、sitemap 菜单
默认的主题配置文件_config.yml中,菜单只开启了首页和归档,我们根据需要,可以添加 about、tag、categories、sitemap 等菜单。
1 | menu: |
更多的图表可以到Font Awesome中文网里面去找,其中 || 后面是你想要设置的图标的名字。
手动生成 hexo 菜单对应文件
新建 about 页面
about 页面一般用来介绍站点信息和博主的个人介绍等。
1 | hexo new page about |
然后会发现多了个source/about文件夹,里面有一个index.md文件,可以使用Markdown写一写自己想写的内容。
新建一个 tags 页面
1 | hexo new page tags |
在tags页面文件 source/tags/index.md 的头部修改为:
1 |
|
新建一个 categories 页面
1 | hexo new page categories |
在 categories 页面文件 source/categories/index.md 的头部修改为:
1 |
|
新建一个 404 页面
首先在source目录下创建自己的 404.html:
注意:Hexo 博客的基本内容是一些 Markdown 文件,放在 source/_post 文件夹下,每个文件对应一篇文章。除此之外,放在 source 文件夹下的所有开头不是下划线的文件,在 hexo generate 的时候,都会被拷贝到 public 文件夹下。但是,Hexo 默认会渲染所有的 HTML 和 Markdown 文件。
因此我们可以简单地在文件开头加上 layout: false 一行来避免渲染:
1 | layout: false |
配置 hexo 本地搜索
本地搜索的原理:
对于动态网站来说,可以通过 php 实现。但是,Hexo 博客是静态网站,用不了 php。 NexT主题已经实现这个功能,它用了Hexo的拓展包 hexo-generator-searchdb,预先生成了一个文本库 search.xml,然后传到了网站里面。在本地搜索的时候,NexT 直接用 javascript 调用了这个文件,从而实现了静态网站的本地搜索。
设置过程
安装插件:
1 | npm install hexo-generator-searchdb --save |
然后我们修改站点配置_config.yml 文件,添加如下内容:
1 | # 本地搜索 |
- path:索引文件的路径,相对于站点根目录
- field:搜索范围,默认是 post,还可以选择 page、all,设置成 all 表示搜索所有页面
- limit:限制搜索的条目数
然后修改主题配置文件next.yml:
1 | # Local Search |
设置 hexo 中的 rss 订阅
安装插件:
1 | npm install hexo-generator-feed --save |
在站点配置文件_config.yml 中添加以下代码:
1 | feed: |
配置 hexo 站点的 footer 信息
底部 footer 可以开关显示 hexo 信息、theme 信息、建站时间等个性化配置:
1 | footer: |
头像信息设置
1 | avatar: |
社交信息和友链配置
社交信息配置:
1 | social: |
友链配置:
1 | # Blog rolls |
官方提供的友链放在侧边栏下面,视觉上比较臃肿。
推荐这篇文章Hexo-NexT 新增友链
首页文章不展示全文显示摘要
接在文章中添加 <!-- more --> 来精确控制摘要内容。
首页文章属性
1 | post_meta: |
页面阅读统计
1 | busuanzi_count: |
字数统计、阅读时长
首先安装插件:
1 | npm install hexo-symbols-count-time --save |
主题配置文件next.yml 修改如下:
1 | symbols_count_time: |
站点配置文件_config.yml 新增如下:
1 | symbols_count_time: |
内容页里的代码块新增复制按钮
1 | codeblock: |
配置微信,支付宝打赏
1 | # Reward (Donate) |
文章原创申明
主题配置文件:
1 | creative_commons: |
相关文章推荐
安装推荐文章的插件:
1 | npm install hexo-related-popular-posts --save |
主题配置信息如下:
1 | related_posts: |
代码块风格美化为mac样式
主题next.yml配置文件修改:
1 | codeblock: |
添加豆瓣个人主页
hexo-douban是可以在 Hexo 页面中嵌入豆瓣页面的插件。
安装插件:
1 | npm install hexo-douban --save |
在站点的配置文件_config.yml里写入以下内容
1 | douban: |
- user: 你的豆瓣ID.打开豆瓣,登入账户,然后在右上角点击 “个人主页” ,这时候地址栏的URL大概是这样:”https://www.douban.com/people/xxxxxx/" ,其中的”xxxxxx”就是你的个人ID了。
- builtin: 是否将生成页面的功能嵌入hexo s和hexo g中,默认是false,另一可选项为true(1.x.x版本新增配置项)。
- title: 该页面的标题.
- quote: 写在页面开头的一段话,支持html语法.
- timeout: 爬取数据的超时时间,默认是 10000ms ,如果在使用时发现报了超时的错(ETIMEOUT)可以把这个数据设置的大一点。
如果只想显示某一个页面(比如movie),那就把其他的配置项注释掉即可。
需要注意的是,通常大家都喜欢用hexo d来作为hexo deploy命令的简化,但是当安装了hexo douban之后,就不能用hexo d了,因为hexo douban跟hexo deploy的前缀都是hexo d。
如果配置了builtin参数为true,那么除了可以使用hexo douban命令之外,hexo g或hexo s也内嵌了生成页面的功能。
本地呈现的效果
电影: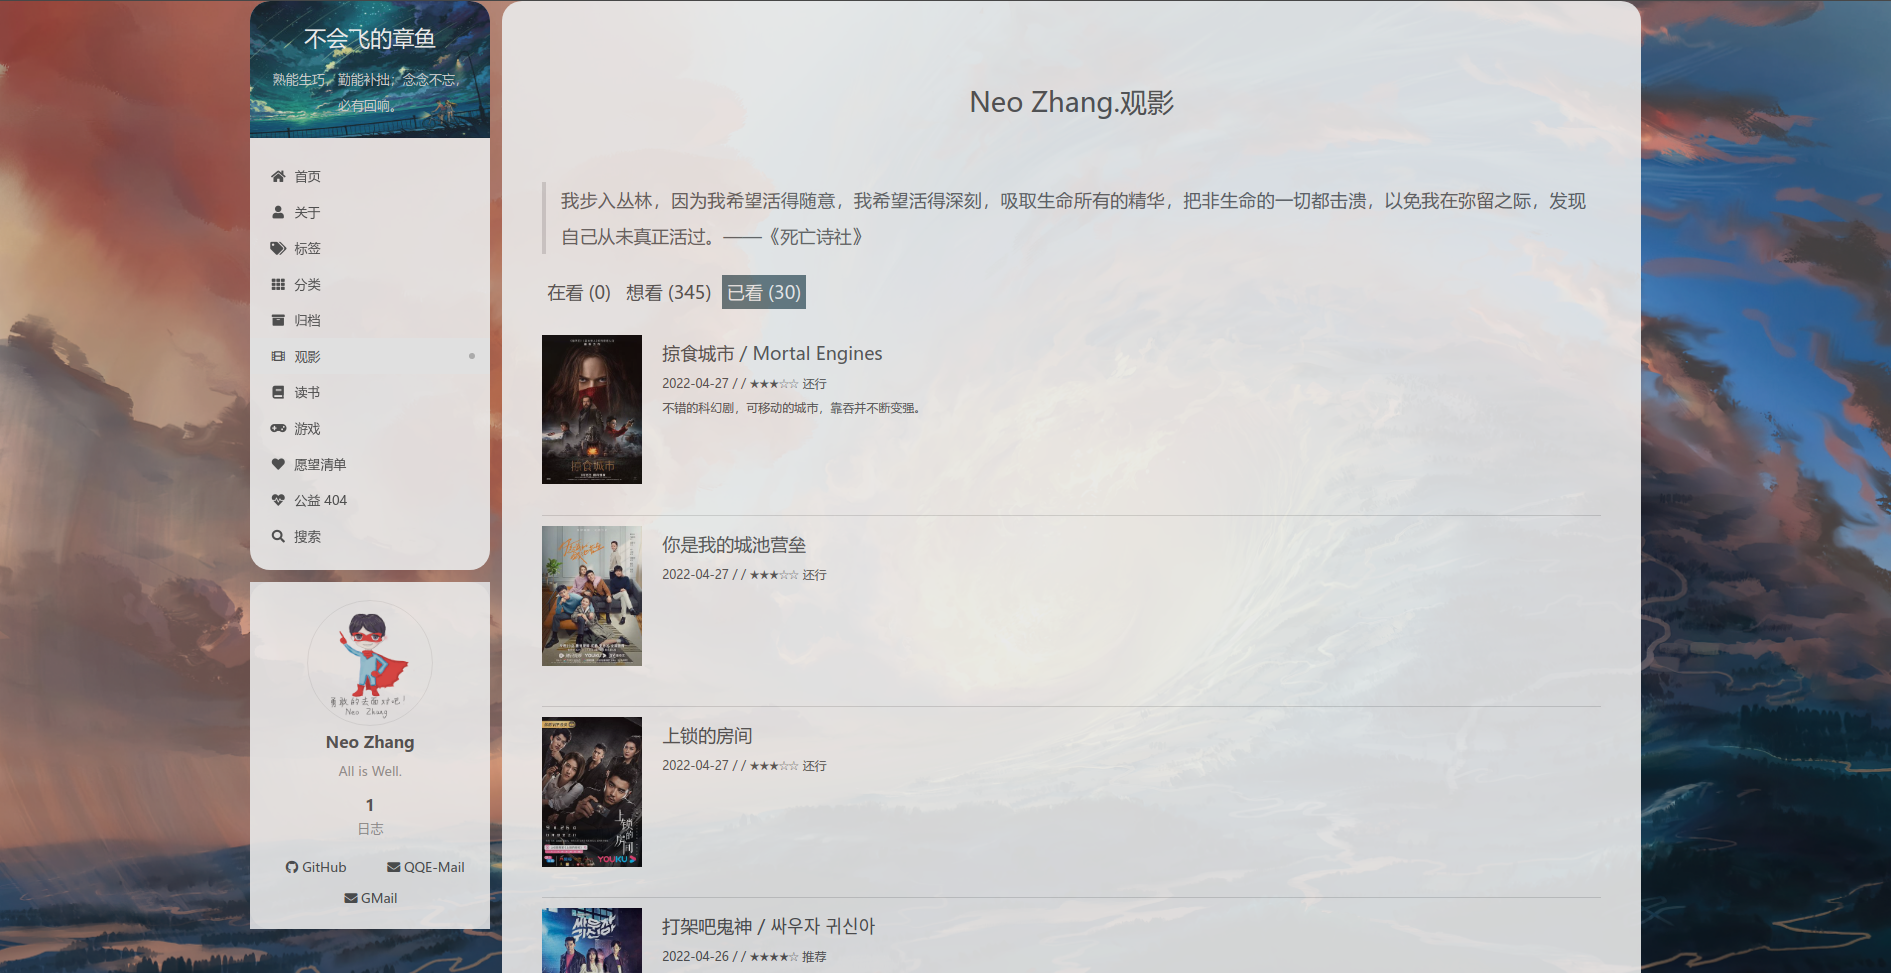
读书: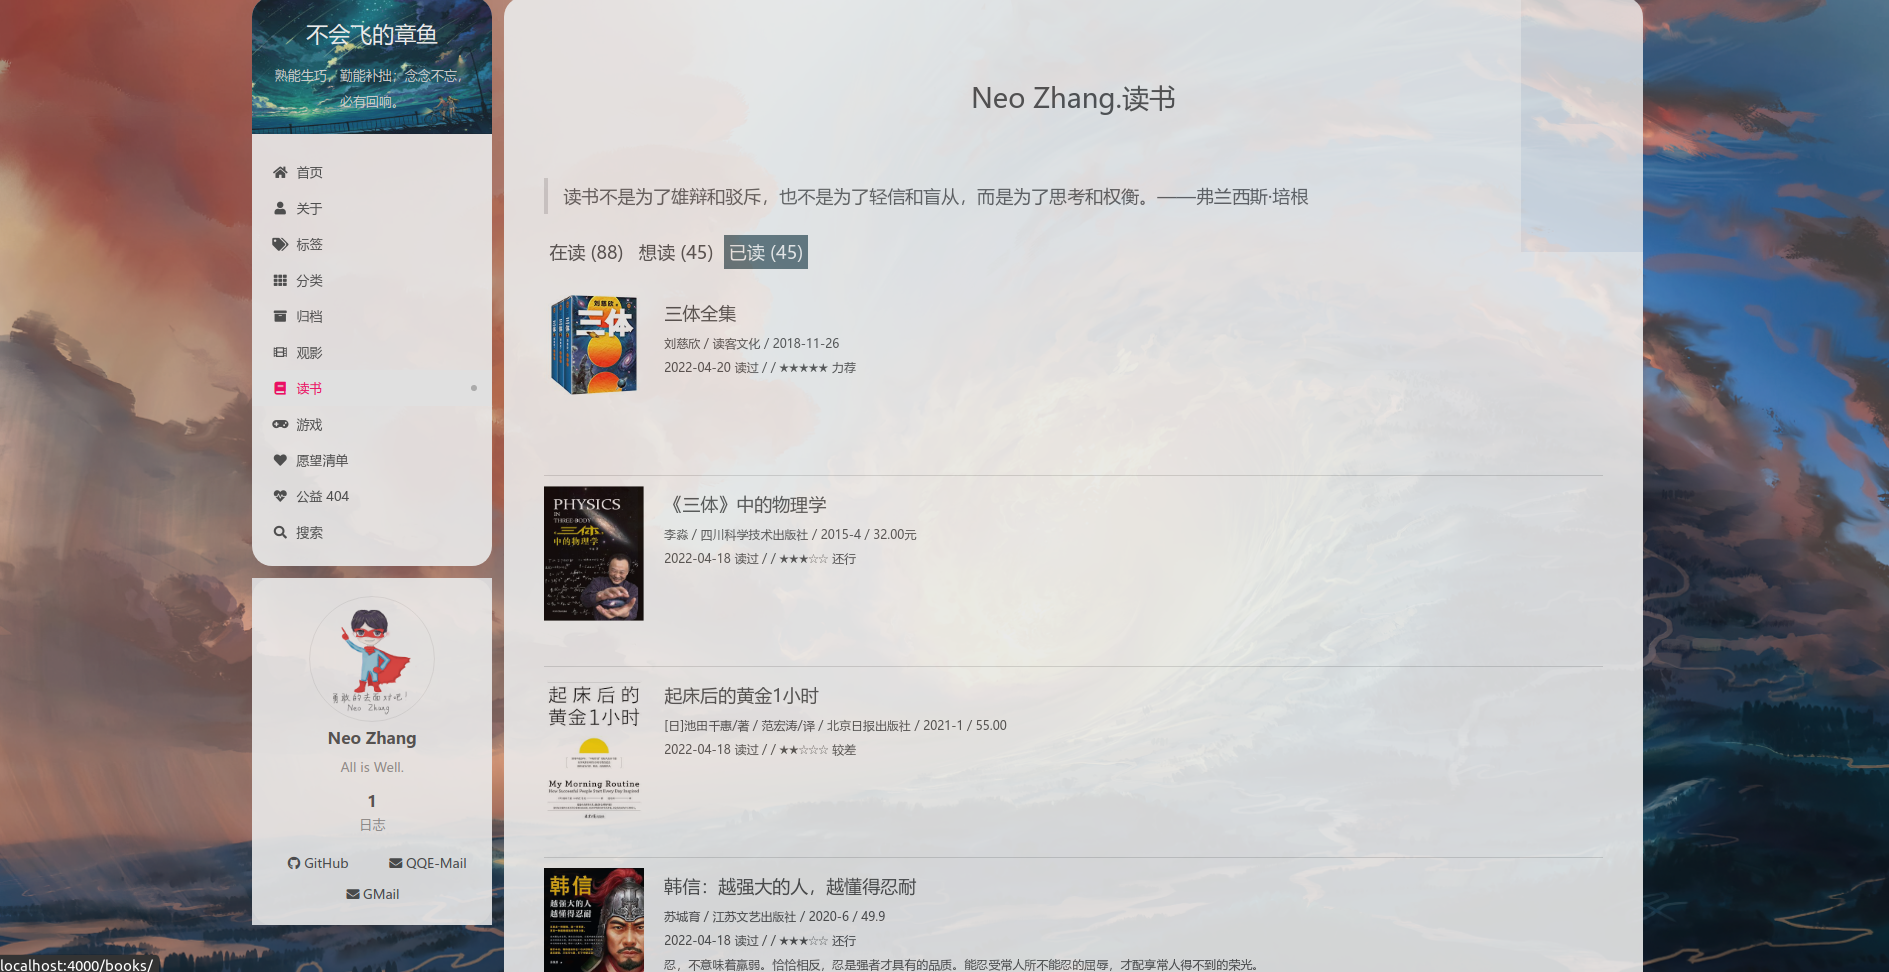
游戏: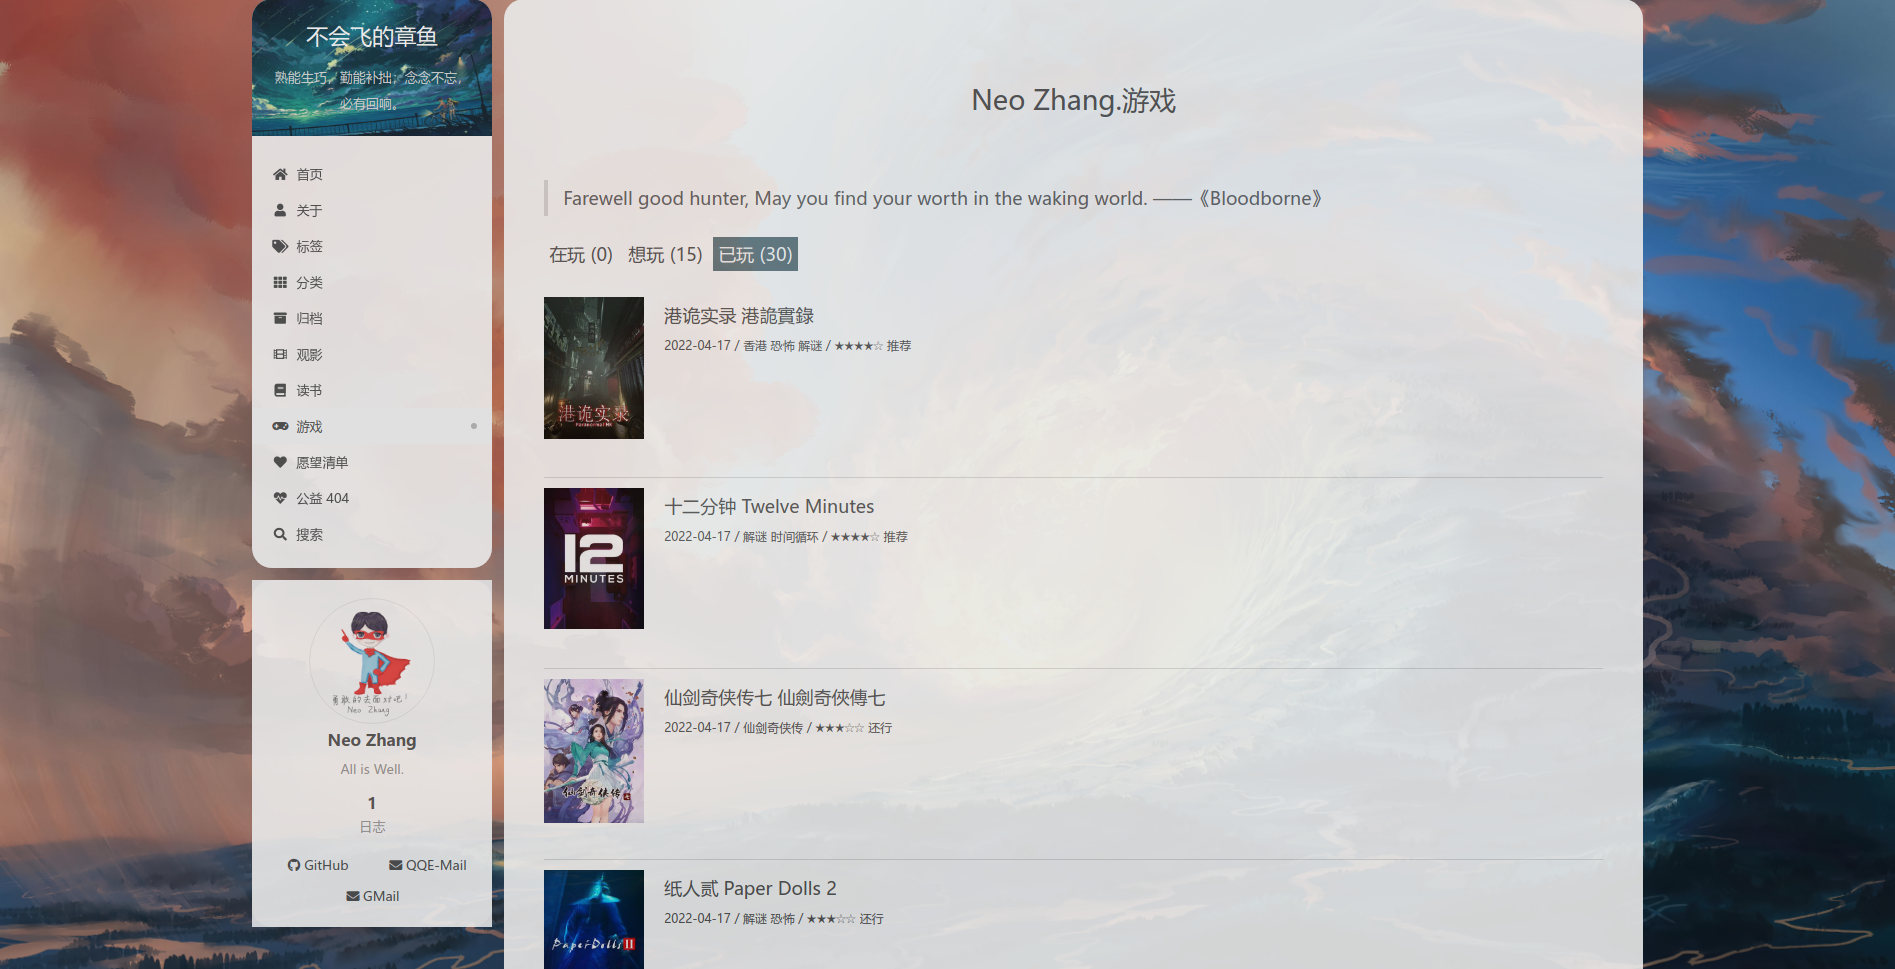
小结
用了大概两天左右的闲暇时间,完成了博客的美化和配置,非常感谢这次出故障的经历,使我翻找官方issue,解决了曾经博客上遗留的许多问题,也成功美化了我的博客,非常开心。
正如《武庚纪》中大剑士子羽被十刑大神抓进牢中后所说的:虽然不想承认,但十刑的直觉是对的,修习已久的炼气术被废,那也只能面对现实,从头练起就是了。首先,必须耐心地去修复错乱受损的经脉,虽然很吃力,但曾经四散的炼气,仍一点一滴重新凝聚起来,化为古剑。我发现,把以往的一切推倒重来,对于剑道反而有新的领悟,如今炼成的剑,只会比以往更强大,更霸道。
希望自己终将炼成属于自己的剑。
参考文章
hexo 主题 next7.8 版本配置美化
hexo theme next7.8 主题美化
Hexo-NexT (v7.0+) 主题配置